.JPG) |
| Poe hard at work. |
"A return to normalcy"-Warren G. Harding used these words to win the 1920 election after WWI. I think it was a great idea because people are always wrecked after war. The economy is always a mess, and all people want is their definition of normal back. It's what I've been going after since we found out about the loss of Baby V. So, as an attempt to return to normalcy, I updated our bedroom.
I posted about redoing the bedroom in this post,
New Project, in September of 2011!! Since that post, I have done pretty much nothing to the bedroom. I got a few odds and ends over the past year and a half, but that was it. Pretty sad, huh? I think I have complained about the bedroom since we moved in. I hated the color! Absolutely hated it! I am almost positive it is the reason I woke up grumpy 95% of the time. The ceiling was an ugly yellow, smoke stained mess, and those air vents left a lot to be desired. As you can read, in the original post, my ideas for the bedroom were floating night stands, no head board, and some artsy fartsy thing above the bed. The only thing that stayed the same was the gray paint :).
I got our bed 1 year and 3 days ago. I wrote about it in this lovely little post,
Like a Virgin. I was not a huge fan of beds with headboards, until I bought one. Once the bed was assembled, my original ideas for the bedroom changed a bit. I no longer wanted the floating shelves. We gave them a try, but they were really more of a pain than anything else. Also, they didn't really flow with the bed. When we moved in to Small House Love, I had sent my dresser to Goodwill. I thought it was too bulky, and I was just kind of tired of a dresser. Well, when we got pregnant I realized I had to stop taking over the whole house with my things. I used the closet in the extra bedroom as overflow. Clearly this would have to change with a little one on the way. I knew that Joe's parents had access to an abundance of antique furniture in storage in PA. So off to PA I went to acquire an awesomely antique dresser. A beautiful dresser was found and off to the races it was.
My new view for the bedroom was: new paint and to update the dresser. We got new nightstands at IKEA when we got the chairs for the living room. I was not sure about them at first, I thought they might be too short, but I am really enjoying them now.
As I said, I stuck with gray for the walls. I know, I know, it's super trendy right now, but seriously it has to be the best neutral color out there. Everything goes with gray! Joe and I made our trek to Wal*Mart to get supplies. I went with Glidden's Pebble Gray for the walls. I know lots of folks out there are die-hards for Behr and Sherwin Willams, but I've done a lot of painting over the past 2 years and have really found no reason to spend so much. At the end of the day, paint is paint and it all covers the same for me :). For the dresser I chose Blue Ocean Breeze by Krylon. I'll get into that process in a bit :). Here are a few pics of the bedroom with its new paint job.
 |
| Before |
 |
| Before |
 |
| After- aren't those nightstands great! |
 |
| Before |
 |
After
I feel like the new paint and furniture really opens up the room. It feels more relaxing and inviting than it did a few days ago. I actually wake up happy in my bedroom instead of blah. Oh! I forgot to show the view that I was waking up to every day for the past two years. Every morning I had to wake up and see these ugly air vents and that damn spot! I don't know if you notice it, but it's there in the lower right-hand corner. Apparently the previous owners were freaks and had smoke detectors in EVERY ROOM of the house! Sometimes there were TWO! When we moved in they were taken down and the outline was left behind. It was very annoying for me personally. Really just a huge eyesore. Also, those air vents were just terrible and made me feel gross. They were just dirty and dingy. To update the air vents, I just added a few coats of white spray paint :). Easy peasy.
|
 |
| The eyesore |
.JPG) |
| Before |
 |
| After- Much cleaner and no eyesore :) |
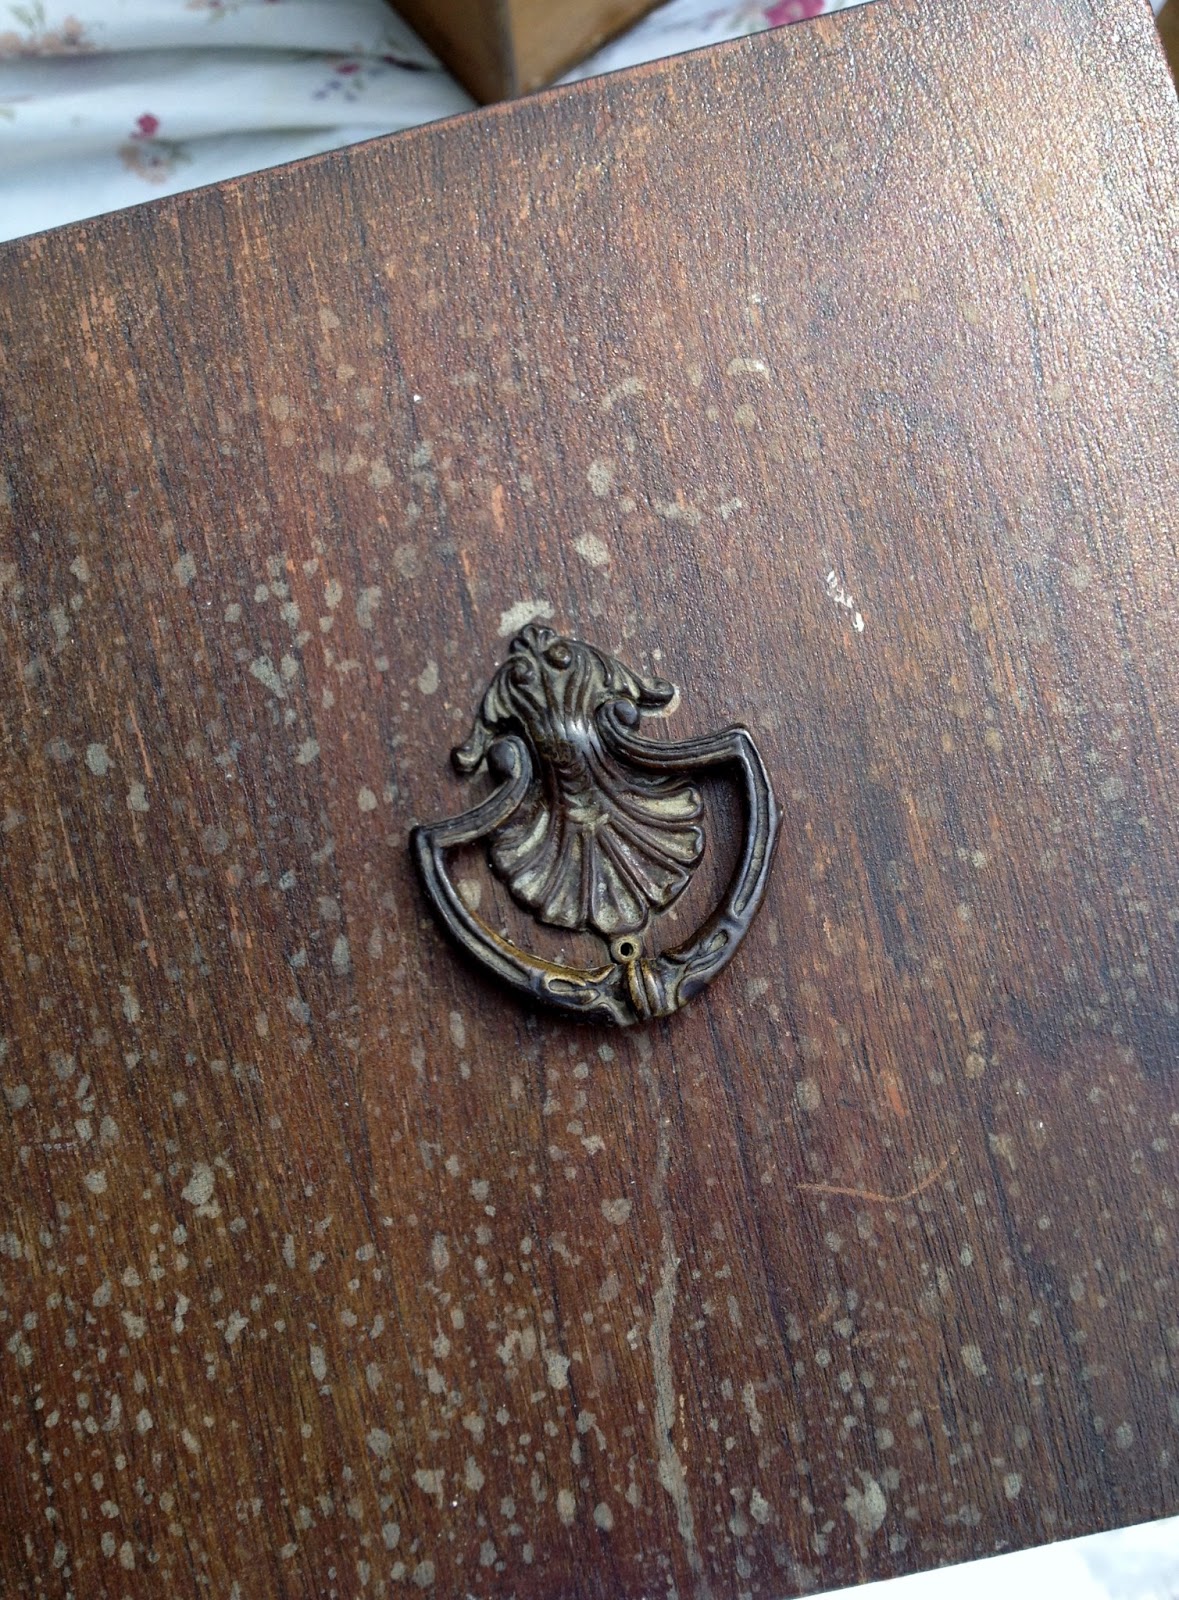
Onto the dresser. I had not originally intended to spray paint the dresser or use such a bright, bold color. I was always going to paint it, but I was thinking more along the lines of an antique white with a pretty paper Modge Podged on top. Well that all changed with one simple trip to Wal*Mart for a new blind. Joe, aka Hulk, had accidentally broken the other one :). While browsing through, I thought I'd pick up some paint samples, when I stumbled upon the spray paint section. I had read a lot about spray painting wood so I thought what the heck, I'll give it a try. It's cheaper, easier, and quicker. I found a lovely blue, which actually went great with our bed set. There is this sweet little strip of bright blue that runs the length. I have to say I am very pleased with the outcome. Spray painting furniture is actually pretty easy. All ya do is sand, paint, sand, paint, sand, and paint. The last two sanding and painting can be adjusted as needed depending on how many coats ya need. I did this all by hand sanding, but it would have been a lot easier with an electric sander, but we don't own an electric sander so I was left using my own elbow grease. The sanding was not actually that challenging, but an electric sander would have made the job even quicker and a bit more uniform. There are a couple of spots that I just kind of gave up on. Either way you choose, it is still a very simple project. Oh yeah, just make sure you invest in a mask. Safety first, folks :).
I bought one can of primer and 5 cans of the color. Instead of investing in new hardware I updated the old. First, it is beautiful hardware, and second it is beautiful hardware. I mean why reinvent the wheel, right? I chose brushed nickel spray paint, also from Krylon, for the hardware and I was set to go. I personally like Krylon better than Rust-Oleum. I like the spray nozzle on Krylon better. It has a wider path. Another word of advice on spray painting furniture, make sure it is not 100 degrees outside or the paint won't lay right. I got lucky and it was actually pretty pleasant out.
The wonderful thing about wood is that it is easily updated. Thanks to modern advances, if I get tired of the paint I can remove it and start fresh :).
Here are some pics of the dresser before and after :)
.JPG) |
| Before- A seriously beautiful piece the way it was. Excuse the white mark- That is some wood putty to fill in a dent :) |
 |
| Hardware- before. Gorgeous, right?? |
 |
| coming along |
 |
| Seriously, why would I want to replace this? |
 |
| Supplies |
.JPG) |
| After |
 |
| The final product :) |
 |
| A little pop of fun inside the drawers :) |
**I don't know if you noticed, but I also spray painted the light next to the dresser using the brushed nickle spray paint. It used to be black.
.JPG)


.JPG)

.JPG)


.JPG)

